How To Install Solar Panel Mounting Rails
This article is taken passages from <https://www.builditsolar.com/Projects/PV/EnphasePV/ComponentInstall.htm>
Installing the Rails
Once the mount frames are in place, the aluminum rails can be mounted. The rails in turn allow easy installation of the PV panels and inverters.
In our case, the rails were provided by IronRidge.
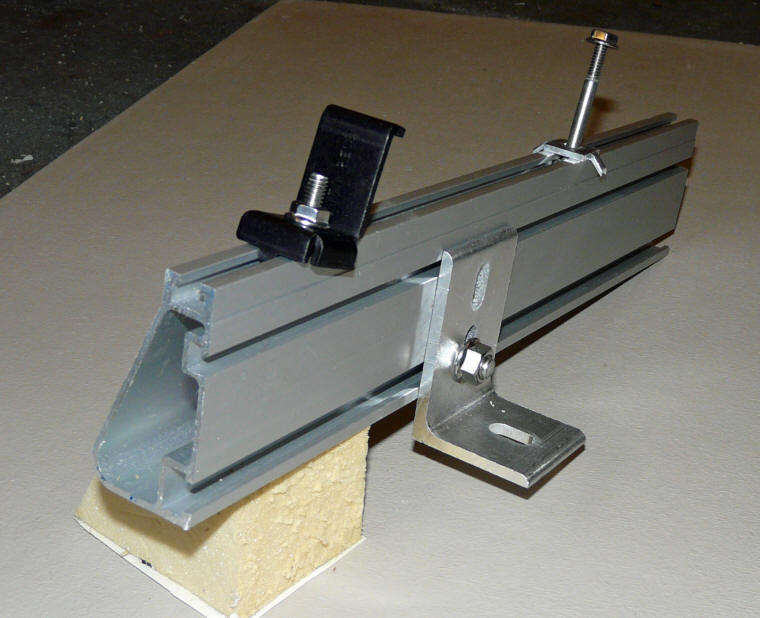
The IronRidge PV mounting rail.
The "L" bracket holds the rail down to the 4X4 mounts.
The back clamp in the top slot fits between two PV modules and clamps them to the rail.
The near clamp is the one used on the end modules.
The IronRidge rail is pictured above.
The "L" bracket attaches the rail to the 4X4 mount frame, and attaches to the rail via the lower slot in the vertical face of the rail.
The head of a 3/8 inch bolt slides into this slot allow the L brackets to be positioned anywhere along the rail. The holes are slotted to allow for a little adjustment.
The black bracket in the top slot is a hold down for a PV panel mounted in the end position.
A 1/4 inch bolt head slides into the top slot to allow the end clamp to be installed anywhere along the rail.
The longer bolt and clamp in the upper slot toward the back of the picture is the clamp that goes between two PV panels to hold both of them down.
The clamps used must match the brand and style of PV panel you want to mount, but a wide variety of clamps are available.
This is a nice system and saves a lot of time in the mounting process. Other manufacturers make similar rail mounting systems -- Unirac is another popular brand.
The first step is to splice the rail sections together to make two rails, each long enough to mount all 10 panels (about 33 ft).
A finished splice is shown just below. A 12 inch long extruded section that just fits the inside of the rail is slid into each of the rails to be spliced. The splice is secured with 4 self tapping screws. This makes a nice strong joint, and is very easy to do.
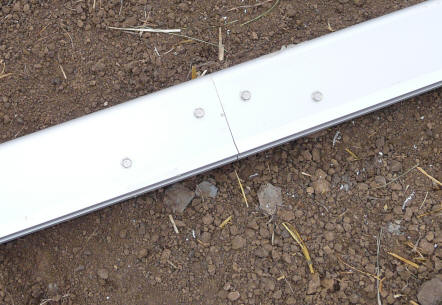
A rail splice. An extruded splice fitting extends 6 inches
into each of the two rail sections that are being spliced.
Four self tapping stainless screws are then used to secure the splice.
I decided to let the rails run a few inches long on each end, and to delay trimming them to exact length until the panels were mounted -- I did not quite trust myself to measure twice and cut once at this stage :)
The mount rails are then installed on the angled 4X4's using the IronRidge provided "L" brackets. Stainless steel bolts are included to mount the rail to the L bracket. I used 3/8 inch galvanized bolts to bolt the L brackets to through the 4X4's. The holes in the L bracket are slotted to allow a little room for adjustment. All the fasteners are left loose, and the rail is adjusted until it is straight from end to end. Then all the fasteners are tightened. IronRidge provides torque settings for all the bolts, and I used a torque wrench to do the tightening.
Some of the treated wood literature recommends against having aluminum in direct contact with the treated wood, so I painted the bottom of bracket and top of frame to avoid (or at least reduce) direct contact.
click pictures for full size
|
|
|

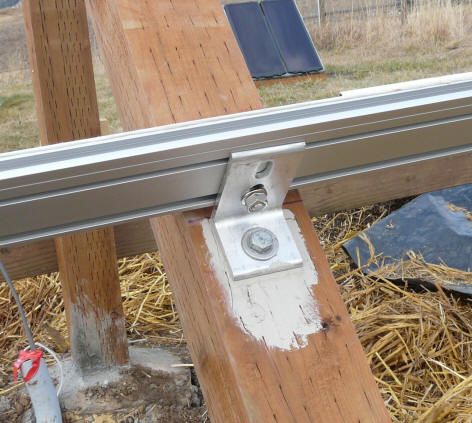
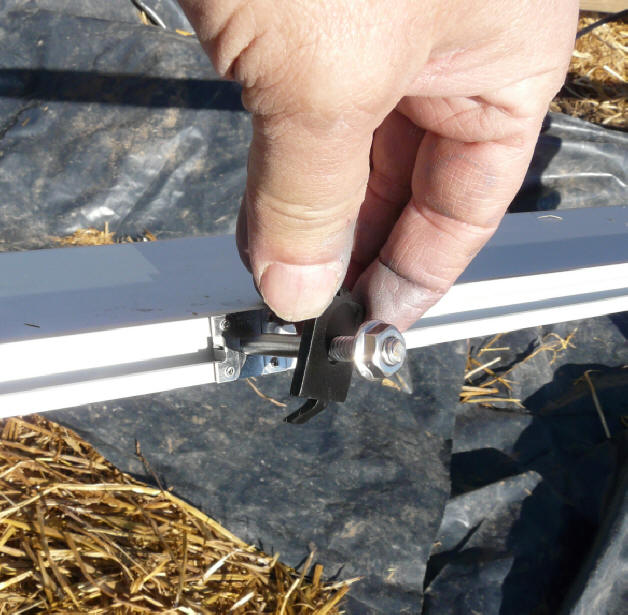
Note that the head of the bolts that attach the rail to the L bracket slide in slots in the rail. This kind of slide the bolt head into a slot is used to for all of the equipment connected to the rail. It makes for nice easy attachments, as the rail slot fits over the bolt head flats and does not allow the bolt to turn as the nut is tightened.
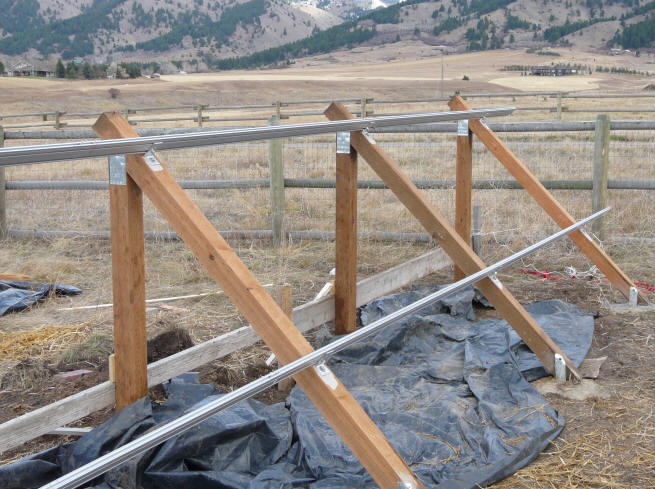
Rails mounted.
Attaching equipment to the rails
It is important at this point to figure out exactly what equipment will be attached to the rails. In our case, this included 1) the PV panels, 2) the micro-inverters, and 3) the grounding straps that insure continuous ground at the rail splices. You need to work out exactly what sequence of bolts will be needed along the rail, and then slide the bolt heads into the rail slot in the right order. If you forget about a bolt that will be needed in the middle of the rail, you will have to slide all the bolts to one side of it out in order to get the missed bolt in.
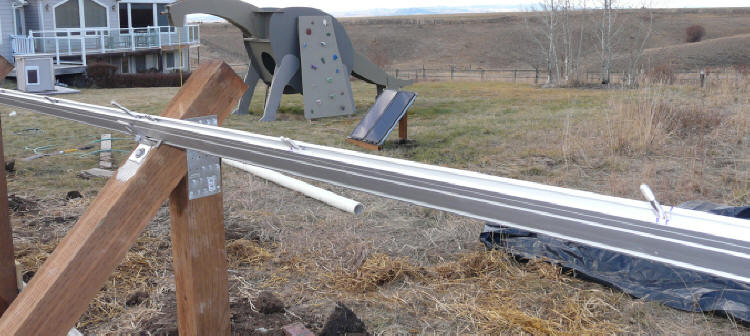
This shows a view along the top rail with the bolts slid into place. The long bolts hold the
panels down. The pairs close together hold the micro-inverters down. There are bolts that don't show
that hold each end of the ground strap at rail splices (see below).
Be sure to double check that you have all the bolts in the right positions before you start installing hardware on the rails.
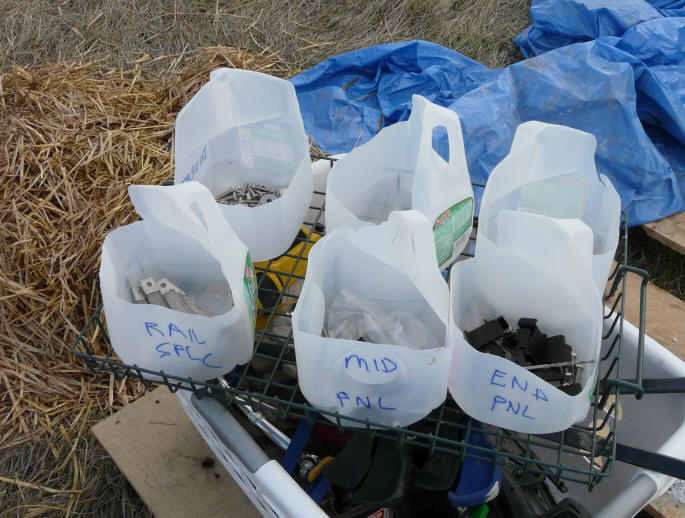
Keeping Things Straight
With all the different things being attached to the rails, there is a lot of hardware to keep straight. I took all the nuts, bolts, and washers out of their packaging, and placed them in cut away gallon milk jugs. For example, all the hardware needed to connect micro inverters to the rail goes in one jug, all the hardware needed to secure a mid array PV panel to the rail goes in another jug. Through some combination of this system and blind luck, I never lost a needed part during the installation.
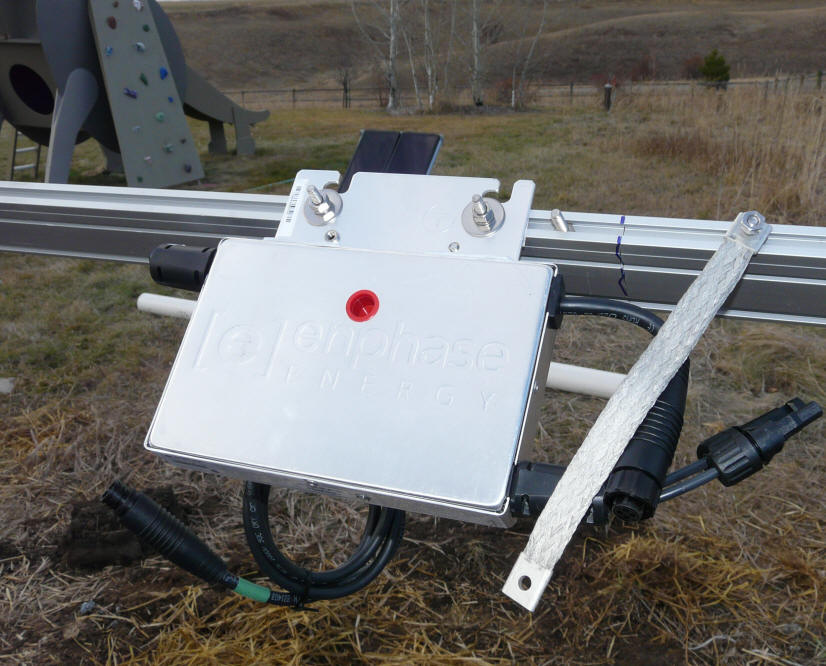
Mounting the Micro-Inverters
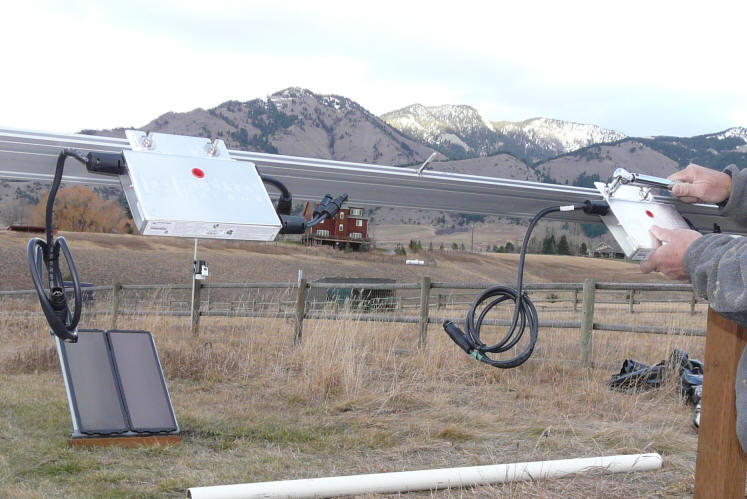
The first thing to go on for our system was the Enphase micro-inverters. On our system, these inverters got mounted to the top rail, as this provided good access to the wires coming from the PV panel junction box to the inverter. To mount the inverters, mark the center of each of the PV panels on the rail, so you know about where each inverter will go.
Mount the micro-inverters starting with the one that will be nearest the junction box that will carry the PV power to the house.
Orient the micro-inverter so that its AC output (male) connector is toward the junction box. The inverter can be mounted with either side up to get the cord pointed the right way.
I mounted the inverters using 1/4 inch stainless bolts about 1 inch long. I used a large flat stainless washer, and then a stainless lock washer, and then the stainless nut to secure inverter. Torque the nut to the recommended torque.
If you are using the Weeb Washer grounding system (see below), then the proper Weeb washer needs to be inserted over one of the bolts and between the rail and the inverter. I used the Weeb washer grounding system for the PV panels and the rail splices but did not use them for the inverters, and ran a separate ground wire (see below) instead. I would say that the Weeb washers would have been easier, and no more expensive, and I would recommend using them to ground the inverters to the rail.
Note that at this point, if you are doing a roof mount, you will probably want to connect the PV panel wire to the inverter, and connect the inverter output AC wire to the next inverter. For the ground mount system, you can do all this wiring later at one time, but for the roof mount, you won't have easy access to the back of the PV panel once its down. Guy shows the way to do it for a roof mount.
Click on pictures for full size
|
|
|
At this point its probably a good idea to peel one of the serial number stickers off the inverter, and put it on the inverter map in the right position (see below) -- its easier to get at the stickers now then after the PV panels are installed.
Do a double check that the connectors are facing the right way, and that the PV panel wires will connect easily with the two DC leads on the inverter.
Then just work you way down the rail installing all the inverters in the same way.
I did not connect any of the wiring together at this time. I waited until all the panels were in, and then did all the connections at one time just after sunset, and after all the rest of the wring was done.
Note that Enphase recommends mounting and hooking up the AC to all the inverters first to make sure they all report in to the EMU, and this may be a good way to go for a roof mount where access to the inverters is difficult after the PV panels are in. It does not seem (to me) to make much difference for a ground mount.
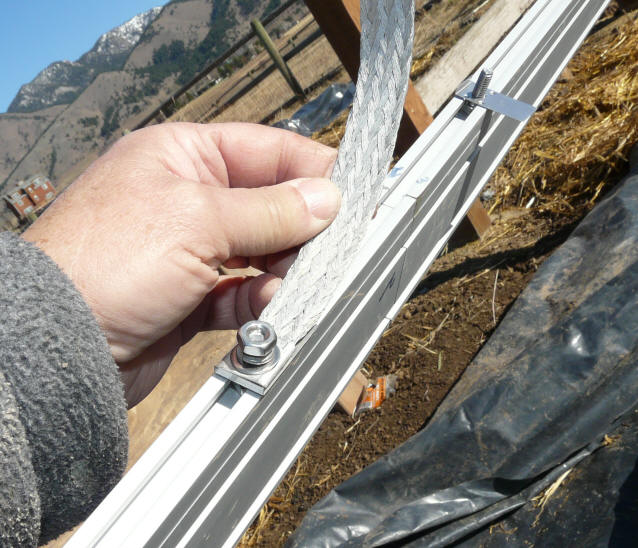
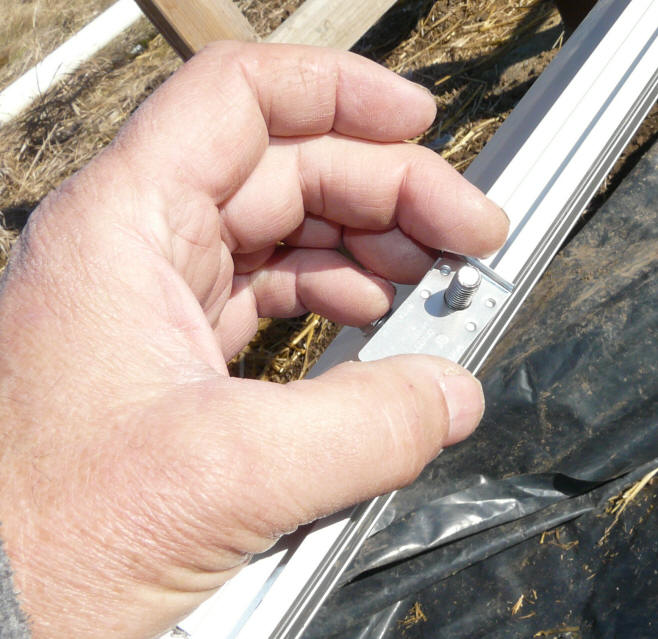
Rail Splice Ground Straps
At each point where you spliced together two segments of rail, you need to install a ground strap across the splice to insure a good electrical connection between the two rail segments.
The pictures below show how the straps are installed. In this case, I used the Weeb washers on each of the bolts. The Weeb washer insures a good (and code approved) electrical connection between the strap and the rail. These Weeb washer connections need to be torqued to the Weeb recommend value, and an anti-seizing compound used on the bolts.
The Weeb washers for grounding are a good way to go -- details here...
|
|
|
|

This is one of those areas where I have to wonder why the extruded rail splice with four self tapping screws through the rail and the splice does not make an adequate grounding connection without these extra grounding straps? But, your inspector may be looking for this, so best to do them.
Attaching the PV Panels
Now its time to mount those $600 PV panels to the rails -- be careful.
Before attaching the PV panels, have a look to make sure that any jobs you have left to do that require access to the area under the PV panels are done. The panels will restrict access -- especially on roof mounts.
My neighbor Scott volunteered to help with this, and this was a big help, and made the job go much faster and accidents less likely. For a roof mount, I think that more than one set of hands would be even more useful.
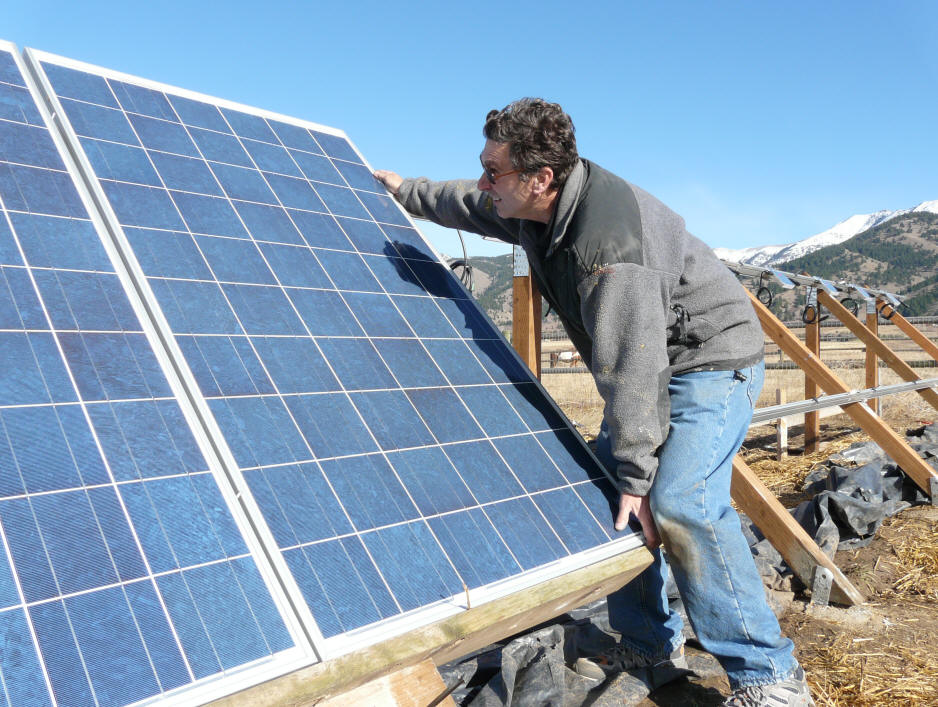
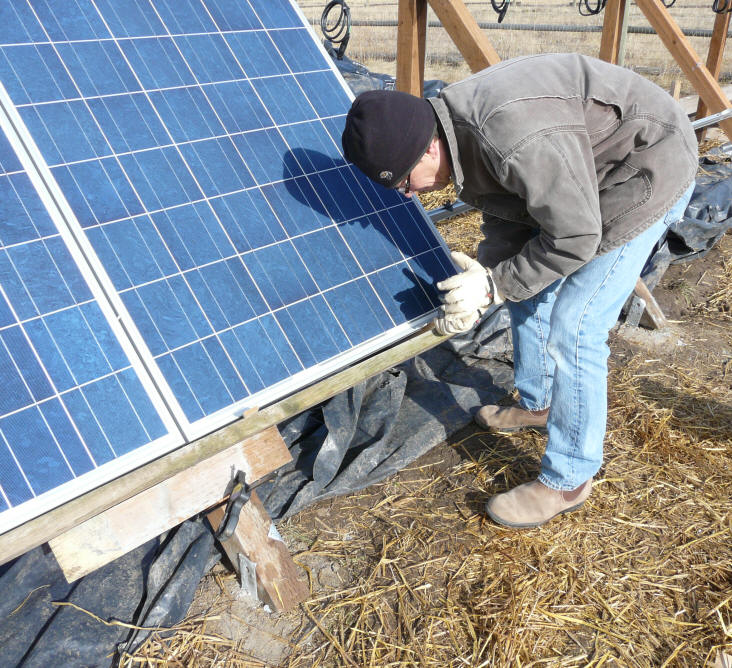
We clamped a temporary wood support to the 4X4 frame along the line of the bottom of the PV panels. This allowed each PV panel to be rested on the wood support while it was being carefully lined up, and then secured to the rails with the clamps. This made accidents less likely, and is (I think) worthwhile.
The panels have a very precise rectangular geometry, and any small deviations from perfect alignment tend to show up. We were having a bit of difficulty getting to "perfect", and Scott came up with the idea of just using tapered wood shims to get that last little bit of adjustment right -- this worked very well, and allowed for quick and precise alignment.
Once a new panel was aligned "perfectly", we tightened the nut down just enough to hold the panel in position, but did not do the final torquing of the nuts until all the panels were in and we could confirm that they were well aligned.
click on pictures for full size
|
|
|
|
After mounting the first two panels, we got a bit concerned that the distance from the bottom rail to the bottom of the PV panels was not exactly the same on the first two panels. We were concerned that we were wandering off the right line, and would end up to low by the time we got to the final panel.
To check this, we stretched a string along the top of the first two mounted panels all the way over to the far end of the rack. This allows us to project the line of the panels and see if we would end up too high or too low by the time you got to the last panel. The projection looked OK, so we left the first two in place and continued on. It turned out that the rails were wandering just a little, and this is what made the rail to bottom of PV panel dimension change a bit.
Its very important to get the first panel precisely aligned. The alignment of this first panel determines the direction of the entire line of panels. The fit of each panel to the next is so snug that there is no chance to adjust the line as you go by varying the gap -- the first panel just needs to be right on.
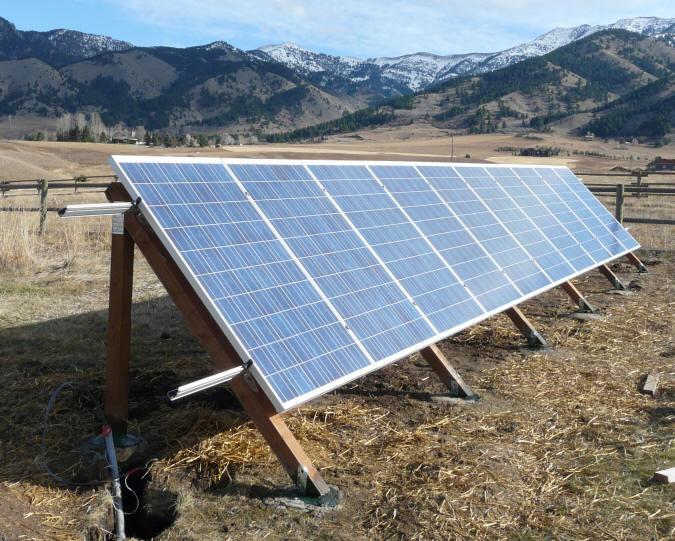
All panels mounted and torqued down. The rails were trimmed to final length later.

After everything is in position and looks OK,
carefully do the final trim of the rails to length.
I used a reciprocating saw with a new blade.